
O.K. folks I got the new lighting kit from Caliber Mengsk a few days ago. I am going to use this in the Pegasus Mercury 9 rocket ship. With that I was asked what features I would like to have the board programmed to do. I requested several steady on, three blinking (with on/off times programmed at my request), and three flickering LEDs. The rest of the pins are all steady on, although I could have requested other functions for the remaining pins.
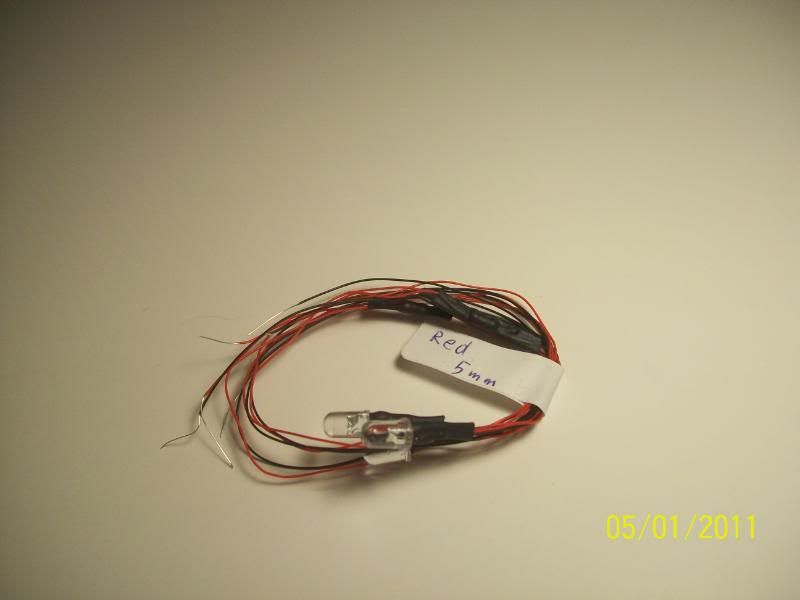
The board and LEDs came nicely packed in a sturdy cardboard box with lots of foam insualtion. The LEDs were grouped and tagged with color and size call outs on a sticker that grouped them together. This was nice as I did not have to wonder which LED was what color.
http://img.photobucket.com/albums/v606/ ... /029-1.jpg
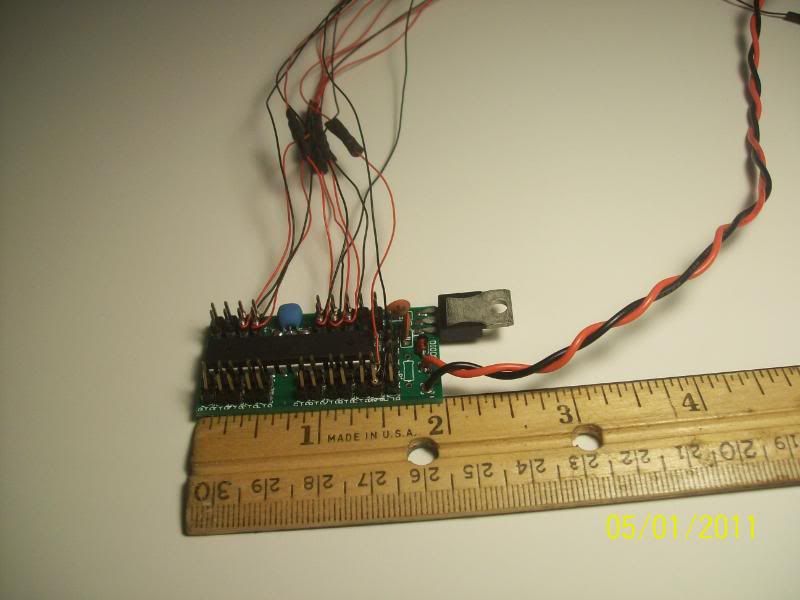
The board itself is well made and appears to be very sturdy and robust. I have dealt with other custom made boards for other projects were the board was not so sturdy. It can run on 5v up to 24v! I would suggest staying in the 6v to 9v range to prevent heat build up. I used a regualr 9v battery for my tests.
The board is about two inches long and should fit in most models. If you are working on a smaller model, like a 1/1,000 Enterprse it would probably have to go in the base.
http://img.photobucket.com/albums/v606/ ... ss/028.jpg
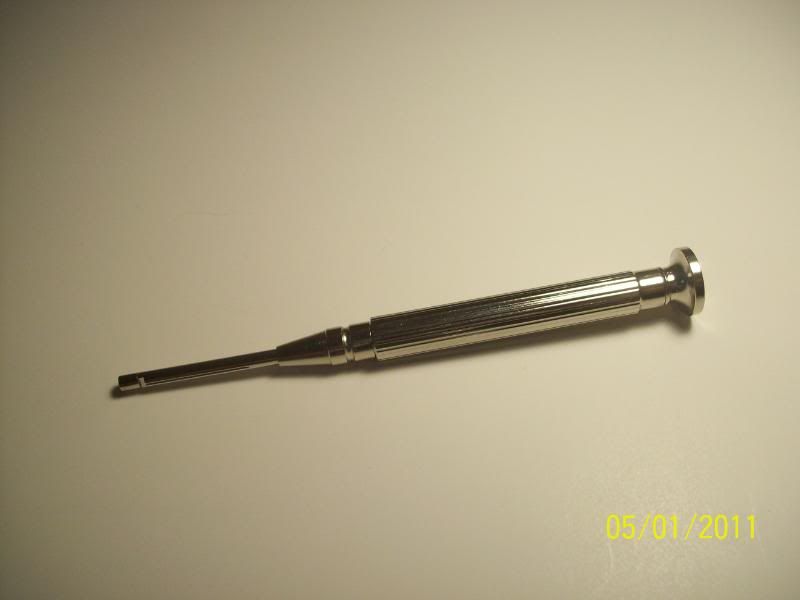
I have never used a wire wrap tool before so I was excited to see how it worked. I picked this tool up at Radioshack for $6 and some change.
http://img.photobucket.com/albums/v606/ ... ss/030.jpg
It looks like a small screwdriver but it has a few well placed holes to allow it to do what it was designed for. I practiced with it for about 20 seconds and decided I have another indispencible tool in my arsenal for lighting models. It works great!
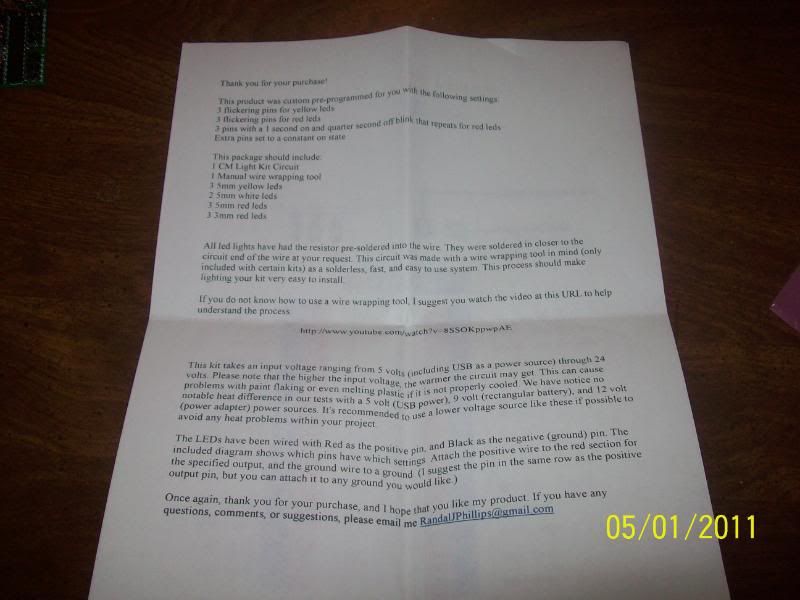
The kit also came with a nice letter describing just what I had ordered, with the functions and tips on how to hook everything up. That in itself is a nice touch and should help newcomers to lighting get over the first time jitters.
http://img.photobucket.com/albums/v606/ ... ss/027.jpg
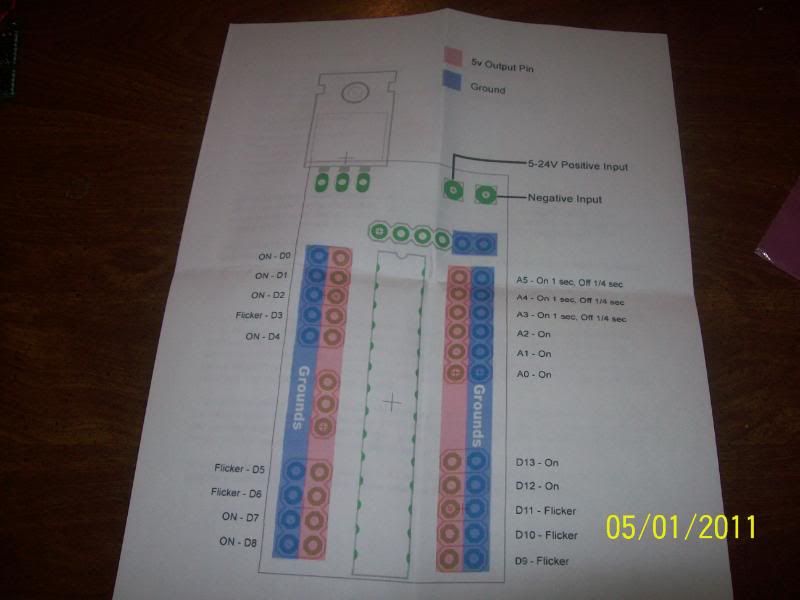
Also included is a diagram of the board itself. There are 20 connection points for the LEDs. Since most will have different features each pin set and what it does is called out. You will see which set of pins does what. Another nice feature.
http://img.photobucket.com/albums/v606/ ... ss/026.jpg
I spent a few minutes last night and this morning wire wrapping some of the LEDs. I have our grandson this weekend so I wasn't able to do a whole lot, LOL. I will say this, using the wire wrap method with the prewired LEDs couldn't have been easier! After reading the instructions on how to use it (a link is also provided in the instructions to a youtube video how-to) I started wrapping. It was actually kinda fun to do! It's a lot quicker than soldering. You dont have to wait for the iron to heat up, no rosin fumes, and you definately wont burn yourself if you pick the tool up by the wrong end!
Here is a short video of how to use the wire wrap tool. You cant get much easier than this. Oh, turn your volume down. The fiancee didn't realize I was recording and you can hear her at the sink and getting in to the fridge!
http://smg.photobucket.com/albums/v606/ ... rewrap.mp4
So that's wire wrapping. Pretty simple huh?
Well I hooked up a bunch of the LEDs and hooked it up to a 9v battery. Impressive to say the least. Each feature I had requested was there. The steady ons were of course, steady on. The blinking LEDs blinked just like I wanted. The yellows that flickered did so very nicely. It's hard to see in the video but the flicker effect is more noticable in person.
http://smg.photobucket.com/albums/v606/ ... httest.mp4
For the blinking effect you can have it programmed for how long you want it on and how long it is off. I went for one second on and a quarter second off. CM can also program other features for LED effects as well. I had suggested a slow build up, flash and then instant off for a photon torpedo effect. He told me he has already done that on another board!
There will however still need to be some small bit of soldering. The included battery leads terminate with bare wire at the end. You will have to solder in a battery connector and an on/off switch. I have PM'd CM with some suuggestions on this. I suggest a 9v snap connector.
For this type of product, the flexability in having different lighting effects programmed for you, the quality workmanship in the board itself, the projected low price point, the supplimental support paperwork and diagram, this product is top of the line all the way! I have lit models for many years prefering to build my own circuits, until now. I plan to acquire more of these boards for projects I have put off due to complexity. This board solves that and more.
Bottom line?
HIGHLY RECOMENDED!
and yes, I was yelling that!
My last comment is that this awesome new board needs a fitting name!
Caliber Mengsk light kit review
Moderators: Sparky, Moderators
Caliber Mengsk light kit review
"Dead or alive, your'e coming with me"
-
Glorfindel

- Posts: 1554
- Joined: Sat May 02, 2009 7:00 pm
- Location: Long Island, NY
-
raser13

- Posts: 3515
- Joined: Sat Nov 24, 2007 3:55 am
- Location: second star to the left and straight on till mourning. other wise known as st. louis,mo
can't wait to see this in a model and working
i love it when a plan comes together
http://s1015.photobucket.com/albums/af278/raser13/
http://s1015.photobucket.com/albums/af278/raser13/
-
Caliber Mengsk
- Posts: 38
- Joined: Thu Aug 26, 2010 11:51 pm
Caliber,
I was just wondering if you were planning on doing a number of standard configurations, such as Starfleet TOS (nav lights, interior lighting and random bussard lights), Starfleet TMP+ (nav lights, formation lights, interior and torpedo effects), Klingon BoP (flickering engines, interior lights, wing spots and blinking marker lights), various Star Wars configurations, etc.
Custom configurations are a cool option but most requests are probably going to fall along pretty common lines...
Mark in Okinawa
"I ordered two hundred oxen, but they sent us all these little..weiner dogs..."
"STAMPEDE!"
"STAMPEDE!"
-
raser13
- Posts: 3515
- Joined: Sat Nov 24, 2007 3:55 am
- Location: second star to the left and straight on till mourning. other wise known as st. louis,mo
hey robiwon, do you have a build up thread for your model going yet?? linky??
i love it when a plan comes together
http://s1015.photobucket.com/albums/af278/raser13/
http://s1015.photobucket.com/albums/af278/raser13/
-
Caliber Mengsk
- Posts: 38
- Joined: Thu Aug 26, 2010 11:51 pm
@SeoulWind
I'm not really a modeler, so I don't have those models, so I don't have the timings. I do intend to do that as those types of ships come in to order. I was planning on doing a standard Enterprise one that should be able to work with most of the basic Enterprise models, as I'm sure they are popular to use, and then people can customize off of the top of that.
So, In answer, Yes, but not at the start.
-
raser13
- Posts: 3515
- Joined: Sat Nov 24, 2007 3:55 am
- Location: second star to the left and straight on till mourning. other wise known as st. louis,mo
so, robi, any progress?? just wanting to see how this works.
i love it when a plan comes together
http://s1015.photobucket.com/albums/af278/raser13/
http://s1015.photobucket.com/albums/af278/raser13/
It's coming, real life has just been real busy and getting in the way of everything lately! Though I do not have the Mercury 9 finished yet I will say that I wholeheartedly endorse this electronic board. It is just too awesome and the wire wrapping of wire and leads is just so quick!raser13 wrote:so, robi, any progress?? just wanting to see how this works.
Stay tuned- Mercury 9 build threads starts this weekend!
"Dead or alive, your'e coming with me"
-
Fokker Ace

- Posts: 1988
- Joined: Wed Mar 02, 2011 9:52 pm
- Location: Vibrating like a fruit mixer.
-
Caliber Mengsk
- Posts: 38
- Joined: Thu Aug 26, 2010 11:51 pm